Setting up Backglow
Requirements
- A Mac with macOS 26 or later. The download runs on Apple silicon Macs; on an Intel Mac, build the app yourself with Xcode 26.
- A WS2812B strip (GRB color order), long enough for the edges of your monitor. Up to 255 LEDs.
- An ESP32 Dev Module or a NodeMCU ESP8266 with a USB data cable.
- A 5 V power supply for the strip.
- PlatformIO Core for the firmware.
Wiring the hardware
Stick the strip around the back of your monitor as a ring. Where the stand sits, you can leave a gap; you'll skip it in the app later.
| Board | Data pin | Label on the board |
|---|---|---|
| ESP32 Dev Module | GPIO 18 | usually “D18” or “18” |
| NodeMCU ESP8266 | GPIO 5 | “D1” |
- Connect the strip's data line (DIN) to the data pin, ideally through a resistor of about 330 Ω.
- Connect the strip's 5 V and GND directly to the power supply. The ESP keeps getting power from the Mac over USB.
- Connect the GND of power supply, strip and ESP. Without a shared ground, the LEDs flicker or stay dark.
- A capacitor of about 1000 µF across 5 V and GND at the start of the strip absorbs inrush spikes.
Check the pinout and voltage of your board before powering up for the first time. The firmware doesn't detect the board; it assumes the pins in the table.
Flashing the firmware
The firmware is in the repository under Firmware/BackglowController. It receives colors at 230,400 baud and caps the strip's brightness at 50 of 255, which is easier on both the power supply and your eyes.
git clone https://github.com/Janldeboer/Backglow.git
cd Backglow/Firmware/BackglowController

# ESP32
pio run -e esp32dev -t upload

# or ESP8266 (NodeMCU)
pio run -e nodemcuv2 -t upload
If several serial devices are connected, pick the port with --upload-port /dev/cu.…. A brand-new ESP8266 may still need its profile storage set up; see Saving a profile.
The folder Firmware/SerialLEDcontroller also holds the original Arduino sketch (70 LEDs on pin 2). It still works but can't store a profile.
Installing the app
- Download Backglow-3.0.1.dmg, open it and drag Backglow into Applications.
- Open Backglow once. Because the app isn't notarized yet, macOS blocks the first launch. Then click Open Anyway under System Settings → Privacy & Security.
See the release notes for what's new.
Building it yourself
cd Backglow
./scripts/build-app.sh
open dist/Backglow.app
The script builds the app and signs it with your Apple Development identity if you have one, otherwise ad hoc. You can then drag Backglow.app into your Applications folder.
Start capturing with the play button at the top right. The first time, macOS asks for Screen Recording permission. Allow it under System Settings → Privacy & Security → Screen & System Audio Recording and restart Backglow.
Backglow follows your system language. To pick a language just for Backglow, add it under System Settings → General → Language & Region → Applications.
Image source
Under Image Source, choose the display the strip is mounted behind.
- Target frame rate: 30 fps is enough for most content; up to 60 is possible.
- Internal resolution: 25% is almost always enough and saves compute time, since only averages matter.
- Ignore black letterbox bars: for widescreen movies, the LEDs then glow in the colors of the actual picture instead of black.
LED layout
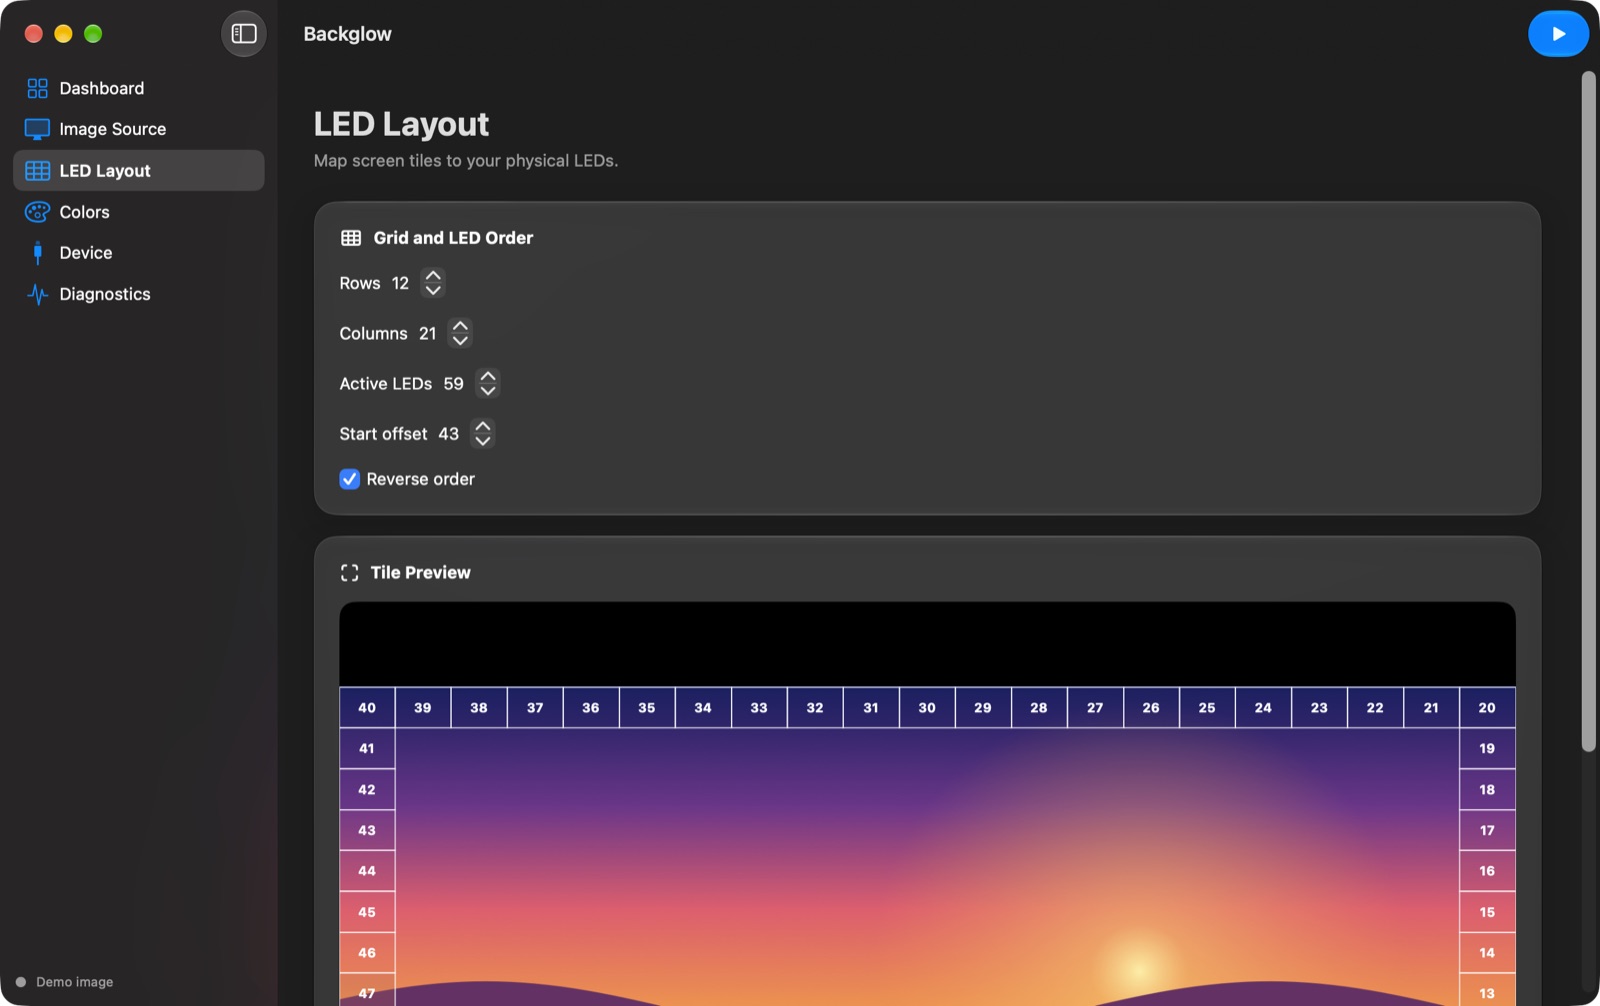
Backglow lays a grid over the picture and uses only its outer ring. Each edge tile becomes one LED.
- Columns: as many as there are LEDs along the top edge.
- Rows: as many as there are LEDs along one side, corners included.
- Active LEDs: how many LEDs actually light up. If the value is smaller than the ring, a gap remains at the end, for example at the stand.
- Start offset: moves which edge tile LED 1 sits at, counted clockwise from the top-left corner.
- Reverse order: for strips laid counterclockwise.
When the preview matches your strip, every LED glows in the color of the tile right in front of it. If everything is off by a few LEDs, fix it with the start offset.
Connecting the controller
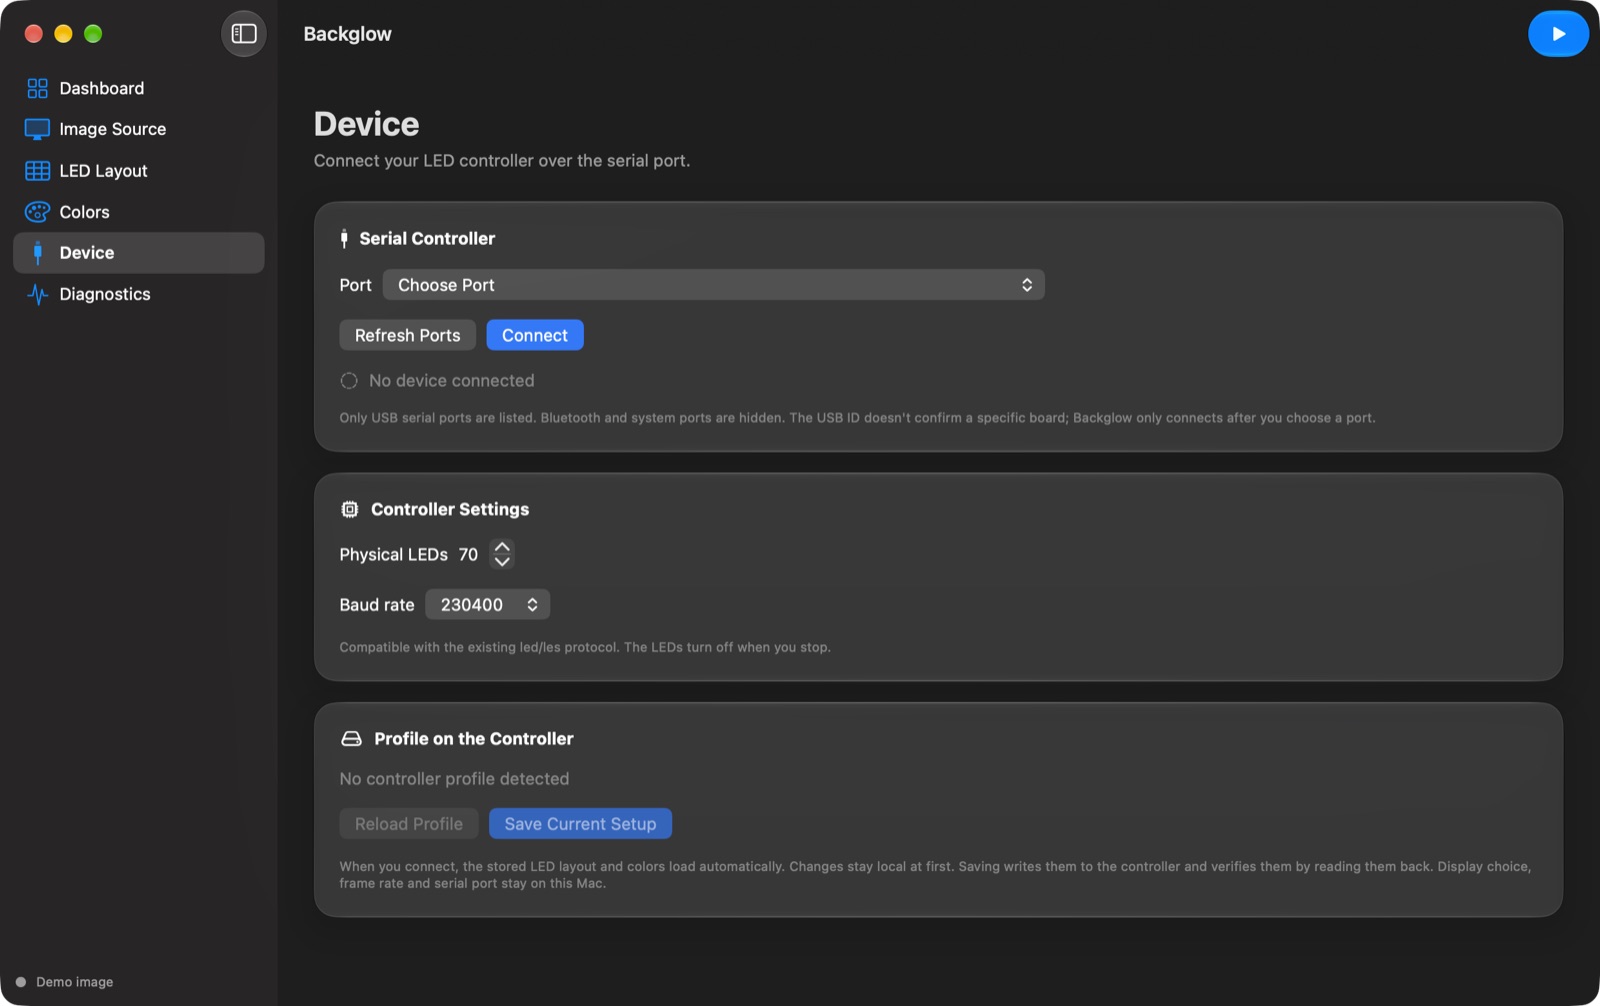
- Under Device, choose the ESP's Port. Backglow lists only USB serial ports; Bluetooth and system ports are hidden.
- Set Physical LEDs to the total number of LEDs on the strip.
- Leave Baud rate at 230400 to match the firmware.
- Click Connect and start capturing.
Backglow never opens a port on its own. When you stop, the app turns the LEDs off.
Tuning colors
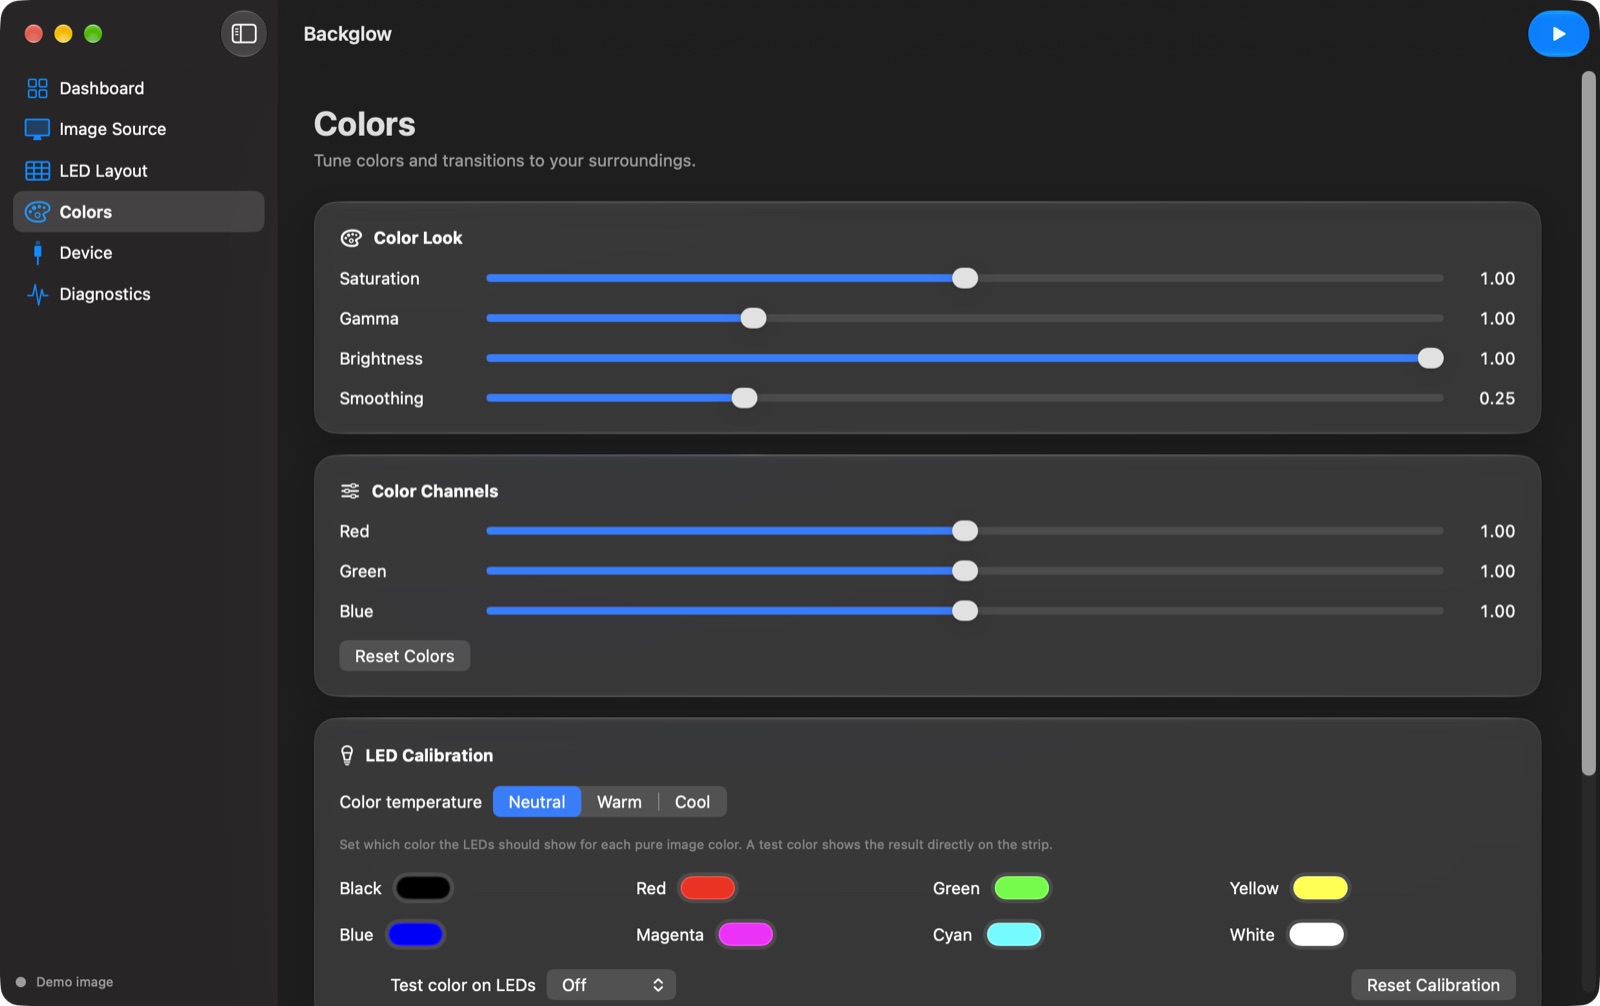
- Color Look: saturation, gamma, brightness and smoothing. More smoothing looks calmer but reacts more slowly.
- Color Channels: compensates for a color cast of the strip or the wall.
- LED Calibration: choose a Test color on LEDs and set how the strip should show that base color. Add a Color temperature (neutral, warm, cool) on top.
- Backlight and Power: a faint backlight keeps the wall softly lit in dark scenes. The power limit dims very bright images evenly.
Saving a profile on the controller
With the firmware from this repository, the controller can keep a profile. Save Current Setup writes the LED layout and colors to the ESP and reads them back to verify. Next time you connect, Backglow loads the profile automatically.
If an ESP8266 can't open its file system area, for example because the board is new, Set Up Controller Storage appears. It formats that area only after you confirm. Any files stored there are lost.
Display choice, frame rate and port stay on the Mac, and for now so do color temperature, LED calibration, backlight and power limit. Settings live in ~/Library/Application Support/Backglow/settings.json.
Troubleshooting
The preview stays empty
If Screen Recording permission is missing, check it in System Settings and restart Backglow. After an update or a new build with an ad hoc signature, macOS may forget the permission. Remove Backglow from the list and add it again.
The ESP doesn't show up as a port
Many USB cables only charge and don't carry data. Try another cable and click Refresh Ports.
The LEDs flicker or show wrong colors
Usually the shared ground is missing or the data line is too long. Also check that your strip really is a WS2812B with GRB order. If red and green are swapped, the firmware doesn't match the strip.
The light is shifted by a few LEDs
Adjust Start offset and, if needed, Reverse order until the colors at the corners match.
For more questions or bugs, open an issue on GitHub.